
Introduction
In our courses we try to provide insight into how the baking process can take shape. Our goal is that students eventually learn to develop their own recipe, instead of repeating recipes from others. Recipes for making bread can be found all over the internet, see e.g. King Arthur Bakery. Another simple instruction to start baking bread, including a video can be found here. with & video.
Below is an explanation of the information shared in the basic course.
Abstract
- The video below provides context for this recipe, but try to prevent putting the dough in the oven directly after a stretch and fold ( as shown in the video), give it more time to recover and become springy again in case you do a strech and fold. Normally you should be able to bake your loaf directly from the fridge.
- Long warm fermentation at room temperature ( +/- 12 hours / 18- 24 degrees Celsius
- Long cold fermentation ( +/12 hours)
- About 15 – 20 min of total work
- Rule of thumb, the more water in the dough the “better”, remember the narrative of making bread is closely related to the properties of water.
- During fermentation make sure your dough doesn’t dry out (use closed proofing boxes)
- Remember from the workshop how your dough should feel, smell and look like. It’s alive!
- Be gentle while streching and folding the dough, your dough is transforming into a lively and delicate “muscle”. Some extra stretch and folds during initial warm fermentation will help develop the strength of the dough and may help improve your baking results.
Video and additional context
This simple bread recipe allows everyone to make good bread at home, some claim even a 4 year old. It’s a variation on the No Knead method, which uses little yeast, requires long fermentation and provides excellent baking conditions, three key elements to bake a beautiful crusty “French boule” at home. The method itself is quite old and was introduced again and embraced by home bakers in 2006, after a video about it was released by the New York Times. Old techniques rediscovered. Nothing wrong with history repeating itself this way.
- Video: No knead bread New York times
- Video: improve kneading slash / Stretch / Fold
- More information wiki
The recipe
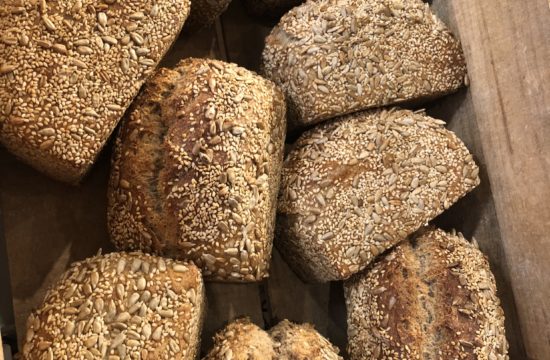
This recipe has three main parts: I-mix and long warm fermentation, II-second cold fermentation (fridge or outside at night) and III-baking. The whole process takes about 26 hours. However, the work itself only about 20 minutes. Start this recipe for example with white flour and as you continue baking bread try to blend white and whole wheat flour improving your bread flavour considerably. Our bread makes a loaf that weighs slightly less than 500 gram (part of the water will evaporate during baking and more as the bread starts to dry out (staling due to retrogradation of starch).
Requirements
- Flour: 300 grams (standard AP white flour, about 11 to 12% protein).
- Water: 204 grams of water (full tea glass of lukewarm, about 25 degrees Celsius). Water with chlorine should be OK for this type of bread. (You can always leave chlorinated water to sit for 12 to 24 hours and the chlorine will dissipate into the environment).
- Salt: 6 grams (2%).
- Instant yeast (about 1/8th of a teaspoon / workshop), available in the supermarkt normally 7 gram per package.
- Preferably an iron cast pan and lid (a lot of mass) that can be used in an oven, and otherwise another steel pan with lid (no plastic parts). Depending on the size of your pan you can adapt the recipe and make either a smaller or larger bread.
- Oven (gas or electric).
- Time: approximately 26 hours, of which only +/- 20 minutes work time.

Part I, DAY 1 in the morning before you leave for work.
Mix the instant yeast with the flour; afterwards add the salt and water. This sequence is important. You want to prevent the dried instant yeast to get in direct contact with water and salt and minimize the chance of killing the yeast that way. Many standard bread recipes call for 63% water (relative to the weight of the flour). Our recipe calls to start with 204 grams of water, which is about 68 % “hydration”. Try to increase this water percentage to 70% or even 75% water in your next baking efforts. In general, the more water you include into your bread, the more flavour the bread can have. Obviously, there is a maximum hydration percentage since we are baking bread and not making porridge. Using low percentage of yeast in combination with high water hydration (70% or more) promotes bigger and irregular holes in the crumb. It’s remarkable to see the delighted expression on the faces of home bakers when they see an open crumb structure. This expression intuitively correlates the open bread crumb with good flavour. Remember, an open irregular crumb structure implies the use of little yeast, i.e. requiring long fermentation times and yielding more complex flavours.
Note that all purpose white flour in the Netherlands (supermarket) usually won’t be able to hold much water. Since we introduce an additional cooling step in this recipe you should be able, even when using this relative cheap – weak – flour to make highly hydrated and relatively good breads. As mentioned before, you will improve your results by mixing whole wheat (or other type of wheat). Try also substituting some of the flour with e.g. patent flour and examine the results. Note that “professional strong” bread flour is available at Baking Lab.
How to proceed?
In this first baking round you start with +/- 204 grams of lukewarm tap water (preferably more). Mix flour, yeast, salt and water to form a dough (as shown in NY Times video example). Water and the carbon dioxide gas produced by yeast will “knead” the dough for you and give the dough slowly its structure. Leave the dough covered (so it can’t dry out) and in a “warm” place (about 18-24 Celsius) for about 12 hours to ferment. Isn’t this too long? Remember, this recipe uses very little yeast, requiring a longer fermentation time. The dough is considered ready when it has at least doubled in volume at and has reached an optimal tension, good to ask yourself why and start think for answers.
We have to take into consideration that some additional extension will take place during the so-called oven spring (baking phase in the oven). During this final rise, carbon dioxide gas which is dissolved into the water is released and also water is converted into steam pushing the dough up. If your dough doubles before these 12 hours and you sense a strong alcohol smell, you are over fermenting the dough. Reduce proofing time or temperature, or preferably reduce the amount of yeast next time. Be careful with too warm fermentation temperatures (stay below 30 degrees celsius). At this stage your dough must smell pleasant. Stretch and fold your dough gently, as experienced during the workshop and shown in the NY Times video). This helps the dough loose some of the trapped carbon dioxide gas, relaxing the dough membrane and allowing new pressure to be build up. Note that carbon dioxide gas is a waste product. Too high concentrations of this gas inhibit the growth of microorganism. The stretch and fold action also helps to distribute the temperature more evenly in the dough and gives the gluten (proteins) more strength. Feel the difference in your dough before and after this stretch & fold.
It is recommended that you taste the dough at this stage. It should have a salty tang. If not, you have either forgotten to add salt or have not measured it correctly. There is still time for corrections. Remember the taste of the dough and match it later with the result of your final bread. This is how you will start to sense what you are doing, touch, smell, taste. About twelve hours after mixing the ingredients give the dough one stretch & fold and put it in the refrigerator (approx. 5-7 Celsius, again in a closed box to prevent moisture loss). You could also lightly grease your dough with oil as an extra way to ensure it will not dry out during fermentation.
Part III, Day 2 Baking in the morning
- Place the iron pan (with lid) in the middle of the oven on a rack. You now have two ovens, your regular oven is warming up the pan or the so called Dutch Oven. Make sure there is enough space for the dough to rise in the pan.
- Set any type of oven to 230-240 Celsius. The pan should be hot within 30 to 40 minutes.
- Take the dough out from the fridge and put it in the pan and bake it.
- If the dough feels very weak give it – very carefully – one last stretch & fold, watch out not to deflate it too much! If the dough is springy and resilient (remember the workshop poking test) and recovers after touching it carefully, you can put the dough in the hot pan, if not wait until it becomes springy again. Try to find out what the advantage is of putting cold dough directly in your hot Dutch oven.
- Be careful taking the pan out of the oven, it’s hot! (look at the NY times video for an example). Throw some flour in the pan, if it burns directly, your pan is too hot, in that case let it cool for a minute or so before adding the dough and returning it to the oven with the lid on.
- Bake the bread in about 30 to 40 minutes (small breads bake quicker than larger ones, a 500 gram bread should be good in about 35 to 40 min). Depending on how thick you want the crust to be the lid should stay on for 15 to 30 minutes. The longer the lid stays on the pan, the thicker the crust will be. The bread needs at least 10 minutes without the lid for the crust to dry and get a nice orange yellow brown colour. Experiment!
- You can score the dough, but also leave it to burst open. The bread is cooked when the core temperature reaches at least 95 °C (do you know why?). You can measure the core temperature with a gauge, or use your senses. Knock on the crust; it should sound “hollow “, this bread should feel light. The colour of the crust should be golden brown or due to our extended cool fermentation red brown. Since we do not trust machines, we use our senses and 98 °C as a minimal core bread temperature.
- Bread with a very open crumb should feel very light after baking.
- Allow the bread to cool down on a rack for about an hour (it keeps cooking at this stag, and developing flavour).
- Enjoy it, with butter, good olive oil or something else that makes you happy.
Dutch Oven
Making bread is not a piece of cake
Making bread is not a piece of cake for many reasons and one of them is water. Water and life are closely related. It’s interesting to note that the narrative of bread revolves around the qualities of water. One of them is the ability of water to absorb lots of heat before it’s temperature rises. Bread contains lots of water and to bake it we need not only take care of the right temperature but we also ensure enough heat capacity. To understand the difference between temperature and heat capacity imagine for example a sauna. You can enjoy a dry sauna of 90 °C, but you would scream and run away if it was a wet one. Water can store much more heat (energy) compared to dry air. Heat capacity is related to mass. A heavy iron cast pan can store more heat compared to a light one. Not all home ovens are strong enough to provide the initial heat shock we require to bake a wet dough and promote a final oven spring. The Dutch Oven method helps overcome this problem. There is more to win using this ancient cooking method, such as moisture retention (closed lid) during the initial baking stage. A closed pan provides a steamy environment. This delays the crust formation, promoting oven spring and later on a better crust environment, which we require for the caramelisation and maillard reactions that take place in the crust. Baking bread at home in a closed pan probably provides the best bread baking conditions.
Old – stale – bread?
Use water and rehydrate your bread and bake it again briefly in the oven. Trowing old bread away , is a missed opportunity to use your creativity.
Balance
Leavened bread is normally the result of fermentation (you can also do it with chemical compounds like baking soda, also known as soda bread). During fermentation we collaborate with living cells, i.e. yeast and bacteria. All living systems are characterised by their their ability to find and maintenance of a unique balance. Making bread is related to this mysterious balance of life and that’s another reason why baking bread is not a “piece of cake”.
When is my dough ready for baking?
Poking test
Every dough has its own “personality”. The shape and size of the bread may also require different handeling and timing procedures. The round boule shape is usually able to withstand more pressure than the more elongated and vulnerable batard shape. Small and flat breads are usually a little easier with respect to their timing than large breads.
Recipes often refer to a doubling of the volume as a rule of thumb for the final rise of the dough. But you should learn to feel and press (poke) a dough and examine how it springs back (poking test). If it springs back within 2 to 3 seconds for about 2/3 of the indentation for white or pain the campagne you should be ready, but note that a 100 % hydrated whole wheat or rye bread will have completely different structure and “personality” and poking it doesn’t make sense. If the indentation stays (over proofed) or disappears completely (under proofed), your dough is probably not yet ready for baking. The test might work at room temperature, but note that when putting a well proofed dough into the fridge will cause the gluten to tighten. This poking test won’t work well in that case, but this chilled dough will be good to bake and probably result in very good bread. Try to experiment and develop a feeling to understand when your dough is ready for baking!
Experiment!
You can read, see and hear lots about bread. But true knowledge comes only with practise and experiment. Use your senses. Smell, feel, hear, taste and watch carefully what happens during the baking process. Do not be discouraged by failures. New baking attempts could provide meaningful learning moments. Turn so-called failures into discoveries.
Try different flour mix, e.g. replace 10%, 20% or 30% of your white flour for whole wheat flour. Whole wheat bread requires much more water, use in that case between 85% and 100% water. Try changing yeast % and see what happens.
Tip:
Keep aside 5 to 10% of your dough in the refrigerator and use this in your new baking batch to add additional flavour into your new dough. Good bread follows a trend, start warm and end – before baking – cold. Do you know why?
Kneading is actually fun. It helps strengthen the gluten network. Try to knead the dough and see if you detect any difference in the end result. Note, kneading wet dough requires other techniques.
Water & Bread
After mixing flour with water:
- 45% of the total water in dough is associated with (damaged?) starch. Damaged starch (cause of milling) absorbs 2 to 4 times more water than regular starch granules.
- 30% with proteins ( mainly gluten in wheat > glutenin and gliadin)
- 25% with polysaccharides (pentosans, another type of sugar)
Starch is said to be a highly hydrophilic polymer (made of glucose units) that consists of linear amylose and highly branched amylopectin chains. However, starch is ORGANISED in such a way that it is mostly insoluble in cold water, so it’s actually no that hydrophilic in it’s organised state. This structure is DISRUPTED when we apply heat during BAKING, forming eventually a GEL, which makes it suddenly very hydrophilic (strong water binding). After the bread cools to room temperature some of the original starch structure starts to form again. This is called the retrogradation or stalling of the bread (old Bread). Perhaps we can describe starch alternatively as a highly organised polymer that has the potential of becoming highly hydrophilic, depending on the temperature of water.
Bread staling occurs most rapidly at 0–4 °C. The fridge is probably not the best place to keep your bread in.
Further reading
Introduction level I:
- Baking Artisan Bread
by Ciril Hitz - Artisan Baking
by Maggie Glezer
Introduction level II
- From the Wood-Fired Oven: New and Traditional Techniques for Cooking and Baking with Fire
by Miscovich, Richard, Wing, Daniel - On Food and Cooking: The Science and Lore of the Kitchen
by Harold McGee - Bread: A Baker’s Book of Techniques and Recipes
by Jeffrey Hamelman
Advanced level
- The Bread Builders
by Alan Scott and Daniel Wing - Understanding Baking
by Joseph Amendola, Nicole Rees, Donald E. Lundberg

Thanks for attending our workshop!
Learn more about our experiments:
https://www.instagram.com/bakinglab.amsterdam
Bread flour and baking equipment is also available in our shop.